

rim
2025.4.24
12:24:07 PM
PST
[tutorial] HTML with google forms
this has been requested a decent amount, and i decided it's about time i should have made this.. here's how to use HTML with a google form, as seen on the register page of the s/i webring! (pictured below)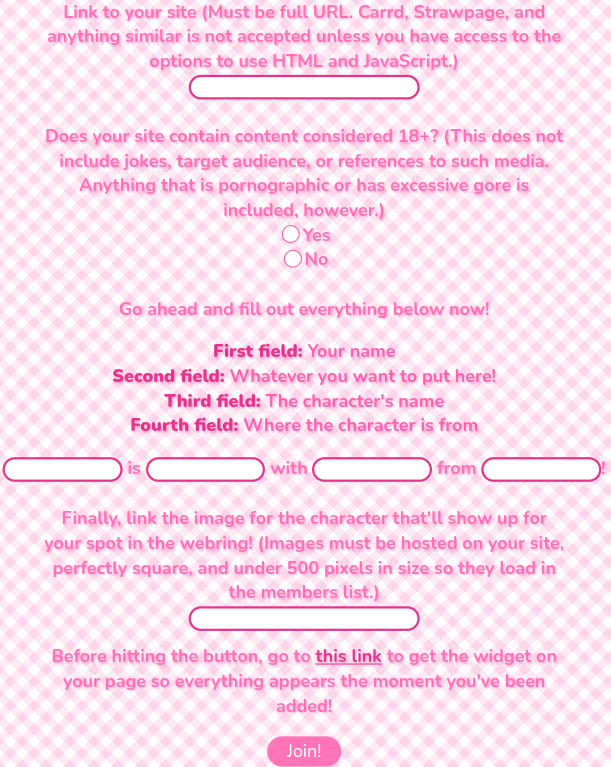
1. make your google form
can't do this without one after all. just make your google form and put all your questions, etc. whatever in there. it'll be different for every form based on what you want to do with it, but below is the one i'll be using for this example. i highly recommend to also have it connected to a google sheets thing for the form in case you actually plan to use the information for something, keeps it neat and organized.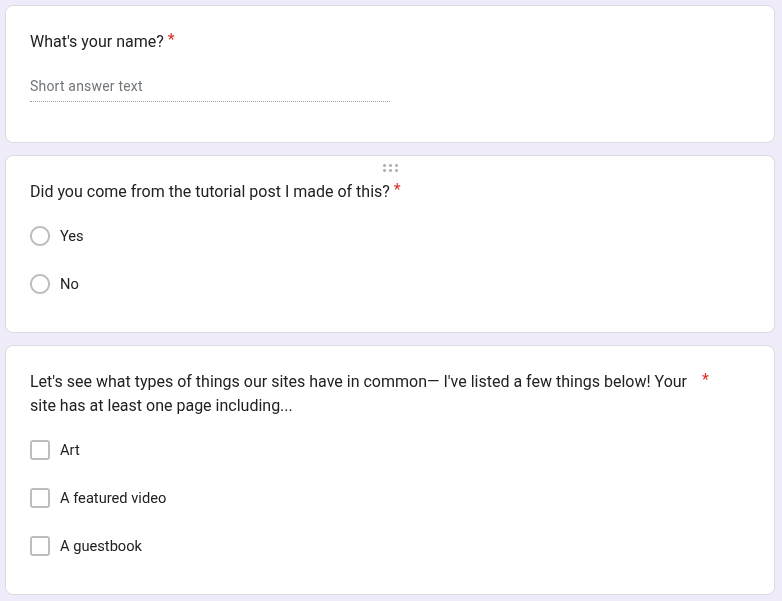
2. autofill the google form to get everything you'll need for the input elements and get the url of the google form so the html form works
2a. form link
you can copy the link from the paperclip icon in the top bar. don't use the shorten link option for the link to fill out the form, it won't work. then, change "viewform" in the url to "formResponse". THIS IS CASE SENSITIVE!after doing so, your link should look something like this, except everything between "/e/" and "/formResponse" is your own form id. this, again, is the one i'm using for my example.
https://docs.google.com/forms/d/e/1FAIpQLSe5GBQWIvvszQ_pP7Nh__Kcuh1-dT-go8DtHSvSyy9a_Dktmw/formResponse
2b. prefilled link
the order and selections don't matter, but i personally think it's a lot more easier when you type in the type of answer wanted in any text fieldonce this is done, copy the link. you should get a url that matches the following format by at least like 90% or so but with what you put in:
https://docs.google.com/forms/d/e/FORMID/viewform?usp=pp_url&entry.123456789=Response&entry.987654321=Selected&entry.246810121=Checked&entry.246810121=Also+checked
3. clean up the prefilled link to get the ids for each field
it should look something like this once you've cleaned it up, but of course with your own ids and whatever thing you put as the answersentry.123456789=Response
entry.987654321=Selected
entry.246810121=Checked
you will only need the parts like "entry.123456789", but it's better to keep the stuff after like shown above so you know which part each id is forentry.987654321=Selected
entry.246810121=Checked
4. go ahead and make your html for the form, but don't put anything in the input element name attributes yet!
there are a few things required for this to work, but everything you need to know is below. follow along as needed! feel free to style everything with css any time though4a. the form element itself
this is where you'll put all the stuff to be filled out inside. there's a bit to do for it though in order for everything to work. in the element, set the action attribute to be the url to the link from step 2a. it should look something like this!<form action="https://docs.google.com/forms/d/e/1FAIpQLSe5GBQWIvvszQ_pP7Nh__Kcuh1-dT-go8DtHSvSyy9a_Dktmw/formResponse"></form>
4b.
make sure the input elements in the html match the types of responses you selected when making the google form (ex. if it's multiple choice, have the input type equal radio). also, make sure the value attributes for all input elements EXACTLY match what you have on the google form. once again, this is case sensitive! this is what i have for my form for this tutorial!<form action="https://docs.google.com/forms/d/e/1FAIpQLSe5GBQWIvvszQ_pP7Nh__Kcuh1-dT-go8DtHSvSyy9a_Dktmw/formResponse">
<label>What's your name?</label><br> <input type="text">
<br><br>
<label>Did you come from the tutorial post I made of this?</label><br>
<input type="radio" id="yes" value="Yes"><label for="yes">Yes</label>
<input type="radio" id="no" value="No"><label for="no">No</label>
<br><br>
<label>Let's see what types of things our sites have in common— I've listed a few things below! Your site has at least one page including...</label><br>
<input type="checkbox" id="art" value="Art"><label for="art">Art</label>
<input type="checkbox" id="featured-vid" value="A featured video"><label for="featured-vid">A featured video</label>
<input type="checkbox" id="guestbook" value="A guestbook"/><label for="guestbook">A guestbook</label>
<br><br>
<button type="submit">Done!</button>
</form>
5. the main part, the name attribute of the input elements!
now we add the name attribute to the input elements, but we do it using the "entry.123456789" stuff from step 3. it needs to include the word "entry" with the dot after it to work.the code for each input element (example used is text type) should look something like the following:
<input type="text" name="entry.123456789">
for multiple choice select radio inputs, checkbox inputs, or just about anything that doesn't allow typed responses, set the name attribute of all options to the same entry code like so:
radio input
<input type="radio" name="entry.987654321" id="yes" value="Yes"><label for="yes">Yes</label>
<input type="radio" name="entry.987654321" id="no" value="No"><label for="no">No</label>
checkbox input
<input type="radio" name="entry.987654321" id="no" value="No"><label for="no">No</label>
<type="checkbox" name="entry.246810121" id="art" value="Art"><label for="art">Art</label>
<input type="checkbox" name="entry.246810121" id="featured-vid" value="A featured video"><label for="featured-vid">A featured video</label>
<type="checkbox" name="entry.246810121" id="guestbook" value="A guestbook"><label for="guestbook">A guestbook</label>
<input type="checkbox" name="entry.246810121" id="featured-vid" value="A featured video"><label for="featured-vid">A featured video</label>
<type="checkbox" name="entry.246810121" id="guestbook" value="A guestbook"><label for="guestbook">A guestbook</label>
6. done!
test out your form!as of right now, i don't think there's a way to came a custom screen for a response going through, so when a response is received, it'll redirect to the google forms screen.
you can view the form i made for the tutorial here. feel free to look at the source code for your own understanding!